
Follow Me On Social Media!
Mango Coconut Sticky Rice Pudding: Tropical Comfort in a Bowl
Mango Coconut Sticky Rice Pudding is a classic Thai-inspired dessert that’s creamy, sweet, and bursting with tropical flavor. The rich coconut-infused sticky rice pairs perfectly with ripe, juicy mango slices and a drizzle of coconut sauce. This visually stunning dessert is perfect for summer gatherings, special occasions, or as a refreshing treat any time of year.

Ingredients
- 1 cup glutinous (sticky) rice
- 1 1/2 cups coconut milk
- 1/2 cup sugar
- 1/4 tsp salt
- 2 ripe mangoes, peeled and sliced
- 1 tbsp toasted sesame seeds or shredded coconut (optional garnish)
- 1 tsp vanilla extract (optional)

Instructions
- Prepare sticky rice: Rinse the sticky rice under cold water until water runs clear. Soak rice in water for 30 minutes, then drain.
- Cook rice: Steam the rice for 20–25 minutes until tender. You can use a traditional steamer or a rice cooker with a “sticky rice” function.
- Make coconut sauce: In a small saucepan, combine coconut milk, sugar, salt, and vanilla (if using). Heat over low-medium heat until sugar dissolves. Do not boil.
- Combine rice and coconut milk: Transfer cooked rice to a bowl. Pour about 2/3 of the coconut sauce over the rice and gently mix. Let the rice absorb the sauce for 10 minutes.
- Assemble dessert: Place a portion of sticky rice in a serving bowl. Top with fresh mango slices. Drizzle remaining coconut sauce over the mango and rice.
- Garnish: Sprinkle toasted sesame seeds or shredded coconut on top for added texture. Serve at room temperature or slightly chilled.
Tips for Perfect Mango Sticky Rice
- Rice texture: Make sure to use glutinous sticky rice for the right chewiness. Regular rice will not give the authentic texture.
- Mango ripeness: Use ripe, sweet mangoes for the best flavor contrast.
- Coconut milk quality: Full-fat coconut milk creates a creamier, richer pudding.
- Make ahead: Sticky rice can be made ahead and stored in the fridge for up to 2 days. Warm gently before serving.

Variations
- Tropical mix: Add kiwi, pineapple, or berries along with mango.
- Chocolate twist: Drizzle a little melted dark chocolate over the rice for a fusion dessert.
- Vegan option: Naturally vegan; ensure no added dairy in coconut milk.
Serving Suggestions
- Serve as a refreshing summer dessert or tropical brunch treat.
- Great for parties, family gatherings, or special occasions.
- Pair with green tea or a tropical fruit smoothie for a full tropical experience.
Fun Facts
- Sticky rice desserts are traditional in Southeast Asian cuisine, particularly Thailand and Laos.
- Mango Sticky Rice is often enjoyed during the Thai mango season from April to June.
- The dessert is known locally as “Khao Niew Mamuang,” and is celebrated for its creamy-sweet balance.
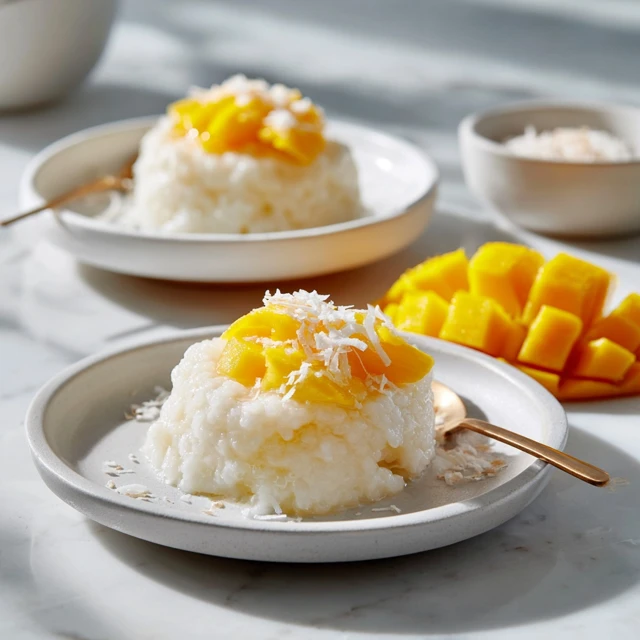
Mango Coconut Sticky Rice Pudding
Creamy coconut-infused sticky rice paired with ripe mango slices and drizzled with coconut sauce.
Ingredients
Equipment
Method
- Rinse sticky rice until water runs clear. Soak 30 min, then drain.
- Steam rice 20–25 min until tender.
- Heat coconut milk, sugar, salt, and vanilla in a saucepan until sugar dissolves. Do not boil.
- Pour 2/3 of coconut sauce over cooked rice, mix gently, let absorb 10 min.
- Place sticky rice in serving bowl, top with mango slices, drizzle remaining coconut sauce.
- Garnish with toasted sesame seeds or shredded coconut. Serve warm or slightly chilled.
Notes
Use ripe mangoes for the best flavor. Rice can be made ahead and warmed gently before serving.