Follow Me On Social Media!
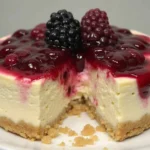
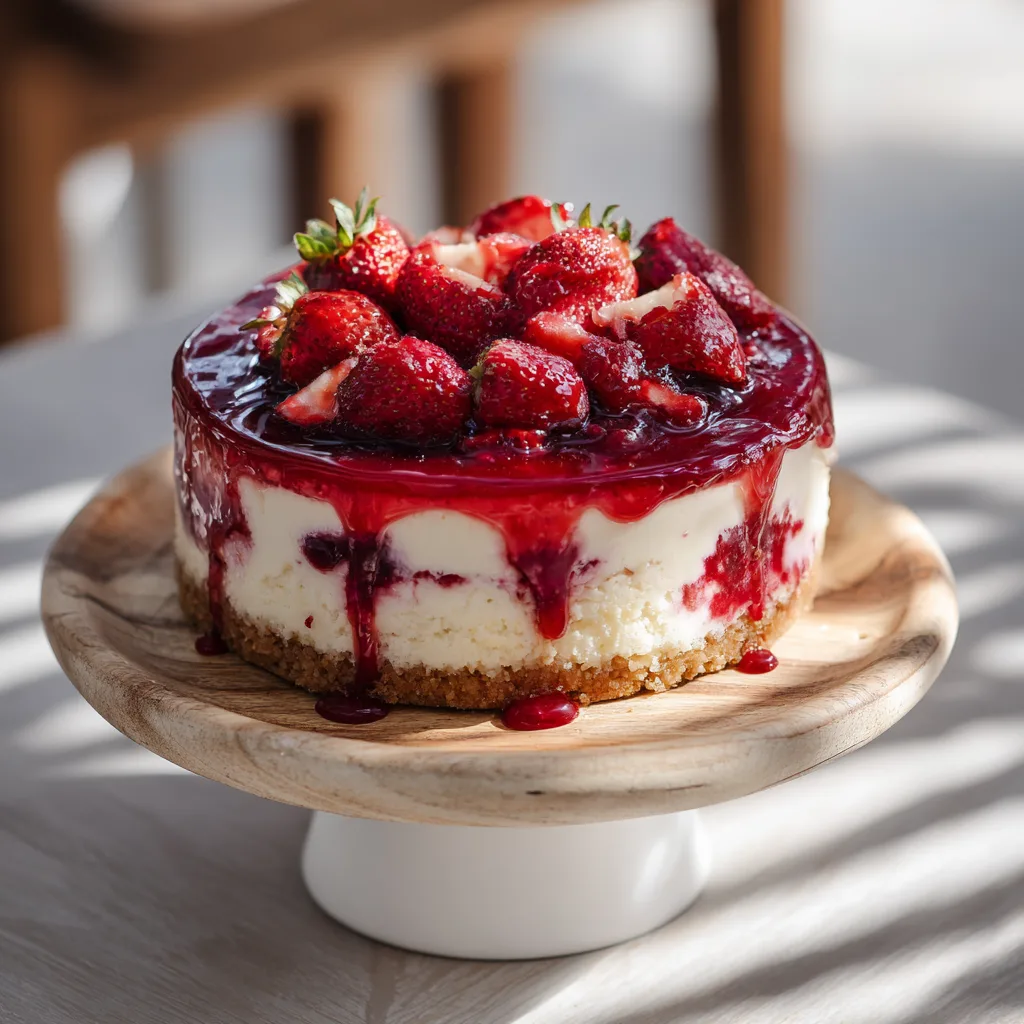
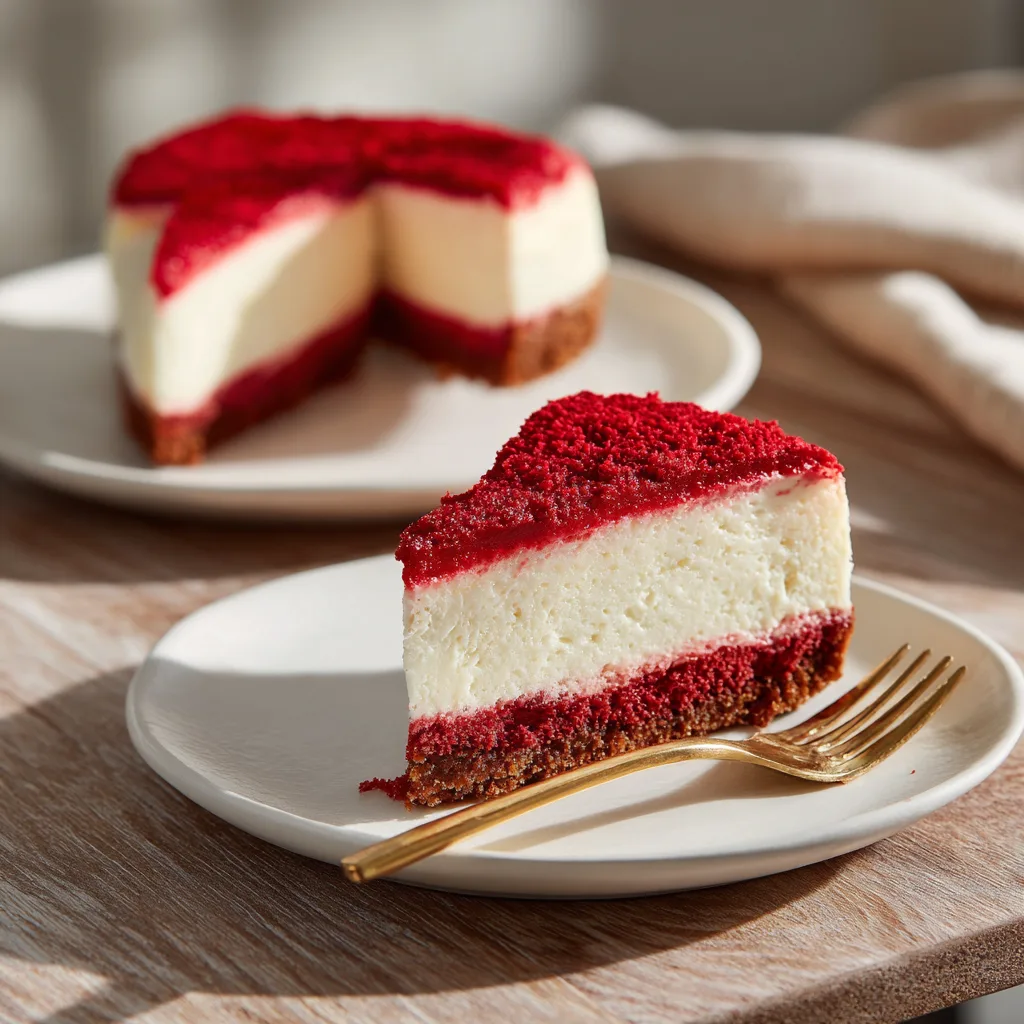
Red Velvet Strawberry Cheesecake
A Luxurious, Show-Stopping Dessert with Layers of Love
Where Red Velvet Meets Cheesecake Magic
Red Velvet Strawberry Cheesecake is not just a dessert—it’s a celebration cake, a centerpiece, and a memory-maker. This decadent creation combines three iconic elements: a moist red velvet cake base, a creamy vanilla cheesecake center, and a bright, fruity strawberry topping that cuts through the richness with freshness and color.
What makes this dessert truly special is contrast. The cocoa-kissed red velvet layer is tender yet structured, the cheesecake layer is smooth and velvety, and the strawberry topping adds sparkle—both visually and in flavor. It’s indulgent without being overwhelming, elegant without being fussy.
Perfect for Valentine’s Day, birthdays, holidays, dinner parties, or anytime you want to impress, this cheesecake delivers bakery-level results right from your home kitchen.
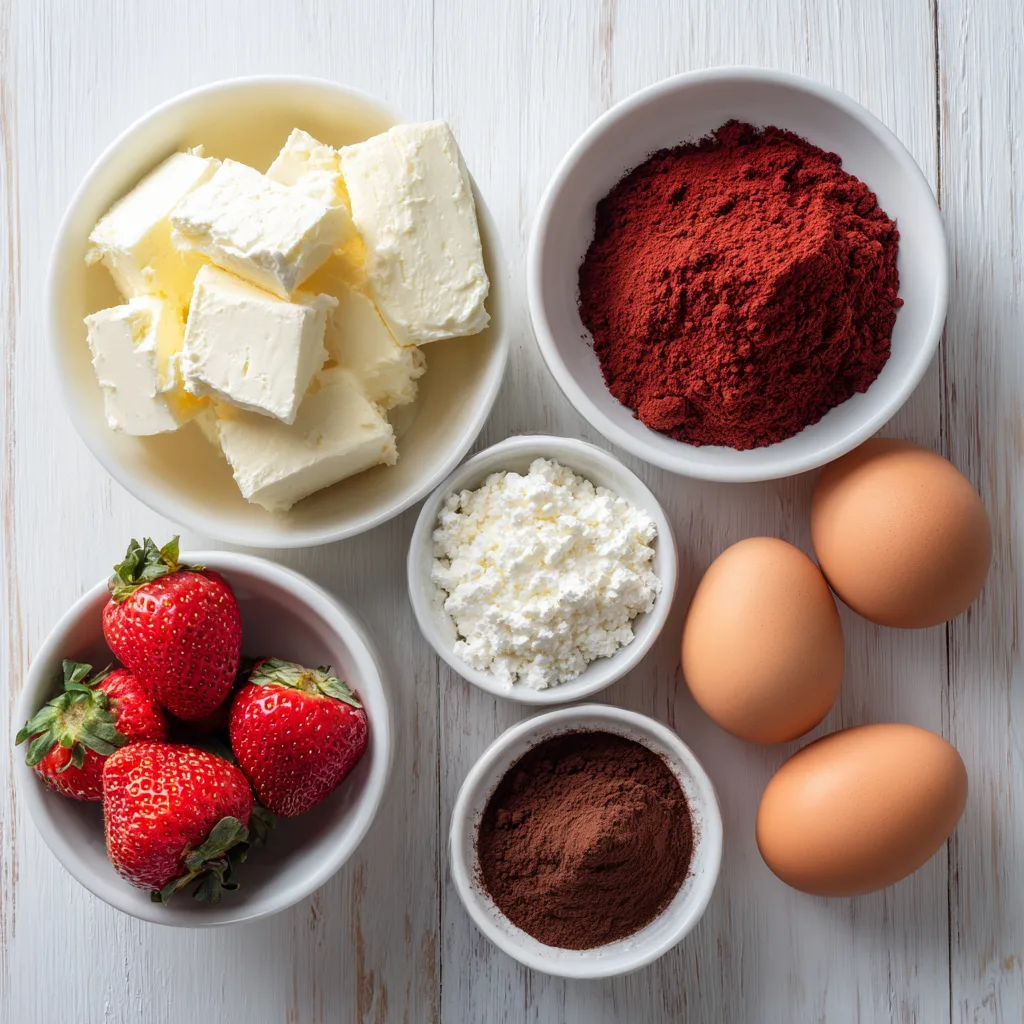
Ingredients
- Red Velvet Cake Layer
- 1 ¼ cups all-purpose flour
- 1 tbsp cocoa powder
- ½ tsp baking soda
- ¼ tsp salt
- ¾ cup granulated sugar
- ½ cup vegetable oil
- 1 egg
- ½ cup buttermilk
- 1 tsp vanilla extract
- 1 tsp red food coloring
- ½ tsp white vinegar
- Cheesecake Layer
- 16 oz cream cheese, softened
- ¾ cup granulated sugar
- 2 eggs
- 1 tsp vanilla extract
- ½ cup sour cream
- Strawberry Topping
- 2 cups fresh strawberries, sliced
- ¼ cup sugar
- 1 tbsp lemon juice
- 1 tbsp cornstarch + 2 tbsp water
Instructions
- Preheat oven to 325°F (165°C). Grease and line a 9-inch springform pan.
- In a bowl, whisk flour, cocoa powder, baking soda, and salt.
- In another bowl, mix sugar, oil, egg, buttermilk, vanilla, food coloring, and vinegar.
- Combine wet and dry ingredients until smooth. Pour batter into pan and bake for 20 minutes. Let cool slightly.
- Beat cream cheese and sugar until smooth. Add eggs one at a time, then vanilla and sour cream.
- Pour cheesecake mixture over the red velvet layer.
- Bake for 45–50 minutes until center is slightly set. Cool completely, then refrigerate 4 hours.
- Simmer strawberries, sugar, and lemon juice until juicy. Add cornstarch slurry and cook until thickened. Cool.
- Spoon strawberry topping over chilled cheesecake before serving.
Why This Layered Dessert Works
Layered desserts are about balance, and this cheesecake nails it:
- Red velvet brings structure and subtle chocolate flavor
- Cheesecake adds richness and creaminess
- Strawberries lighten every bite with brightness
The textures contrast beautifully without competing, making each forkful exciting.
Tips for a Perfect Cheesecake
- Use room-temperature cream cheese
- Don’t overmix after adding eggs
- Cool gradually to prevent cracks
- Chill fully before slicing
Flavor Variations
- Swap strawberries for raspberries or cherries
- Add white chocolate drizzle
- Use chocolate cookie crust instead of cake base
- Add strawberry extract to cheesecake layer
Storage & Make-Ahead
- Refrigerator: Up to 5 days
- Freezer: Cheesecake layer freezes well (without topping)
- Make-ahead friendly: Best flavor after overnight chill

Red Velvet Strawberry Cheesecake
Decadent layered cheesecake featuring a red velvet base, creamy vanilla cheesecake center, and fresh strawberry topping.
Ingredients
Equipment
Method
- Bake red velvet layer and cool slightly.
- Prepare cheesecake filling and pour over base.
- Bake until set, then chill thoroughly.
- Cook strawberry topping and cool.
- Top cheesecake before serving.
Notes
Best served chilled. Add topping just before serving for freshest look.